
Tattoo Studio Lighting in 2026: The $120 Lamp Upgrade That Separates a Walk-In Shop from a $300-per-Hour Custom Studio
There’s a lighting moment in every tattoo session where the artist realizes something is wrong. The client flinches. The needle lifts. The artist leans in, squinting, adjusting their body angle for the fourth time. They blame it on fatigue. They blame it on the chair height. Almost nobody blames the overhead panel — and almost everybody should.
I’ve consulted on studio builds for seven tattoo shops in the past two years. The conversations always start the same way: “We need good lights.” Then I ask what “good” means, and the answer is always “bright.” That’s the wrong metric. Tattoo studios don’t need bright. They need accurate, shadow-free, and adaptive. And those three requirements point to a completely different lighting architecture than what most shops are running.
Why Your Ring Light Is Failing You
The tattoo industry’s go-to solution has been the ring light — a large circular LED panel mounted on an adjustable arm, positioned directly over the work area. It’s intuitive. It’s what you see in YouTube videos. And for a single-artist booth in a shared space, it’s probably fine.
But for a professional studio doing $400-plus custom pieces, ring lights have three structural problems:
Problem 1: Fixed color temperature. Most ring lights ship at 5500K daylight. That’s great for Instagram photos. It’s terrible for extended sessions. Under 5500K for 3-4 hours straight, the human eye fatigues faster than under warmer sources (3500-4000K). Artists report more headaches and more “double vision” episodes — where the needle tip seems to blur — under cool-white ring lights. One studio owner in Melbourne told me that after switching her three booths from 5500K ring lights to 4000K tunable panels, her artists stopped complaining about end-of-day eye strain within a week.
Problem 2: Single-point shadow. A ring light mounted at a fixed position casts shadows from the artist’s hands directly into the work zone. Watch a tattoo session from above and you’ll see it: the artist constantly shifts their own body to dodge the shadow their hands are throwing. It’s subtle but it slows the work. The fix is multi-directional lighting — at minimum, one overhead panel and one lateral fill source at 45 degrees.
Problem 3: CRI inconsistency. Cheap ring lights (under $150) often ship with CRI in the 75-82 range. At that level, skin undertones shift. Red ink looks more orange. Black saturation is harder to judge. The artist compensates by going heavier with passes, which means more trauma to the skin and longer healing times. A CRI 95+ source shows ink colors as they’ll actually appear healed, reducing rework.
The Three-Layer Studio Lighting Architecture
After working through several studio designs, I’ve landed on a three-layer approach that consistently outperforms the “just get brighter lights” strategy.
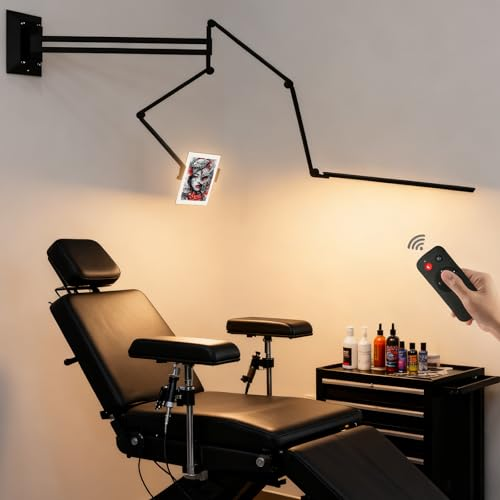
Layer 1: Overhead Task Panel (Primary Work Surface)
Mounted directly above the tattoo chair, this is your high-CRI primary source. Specs that matter: CRI 95+, 3500-4000K (tunable preferred), minimum 2000 lux at chair surface height, frosted diffuser to eliminate hard shadow edges. CAIMETA’s track system with AIcolor modules handles this — the adaptive color temperature feature means the artist can shift from 4000K for color work to 3500K for black-and-grey sessions without getting up. A BLE Mesh wall controller at each station stores per-artist presets.
Layer 2: Lateral Fill (Shadow Elimination)
A second source positioned at 30-45 degrees to the work surface, typically mounted on a wall arm or ceiling track offset from the chair. This fills the shadows thrown by Layer 1. Intensity should be roughly 60% of the primary. Same color temperature, same CRI. In a 12×12 booth, a single 600x600mm LED panel on an adjustable bracket does the job. Cost: $200-$400 per station.
Layer 3: Ambient Room Light (Client Experience)
This is where most studios go wrong. They treat the entire room as a work surface and blast 3000 lux everywhere. The client, lying face-up on the chair for two hours, stares at a ceiling that feels like an operating room. That’s bad for the vibe and bad for retention.
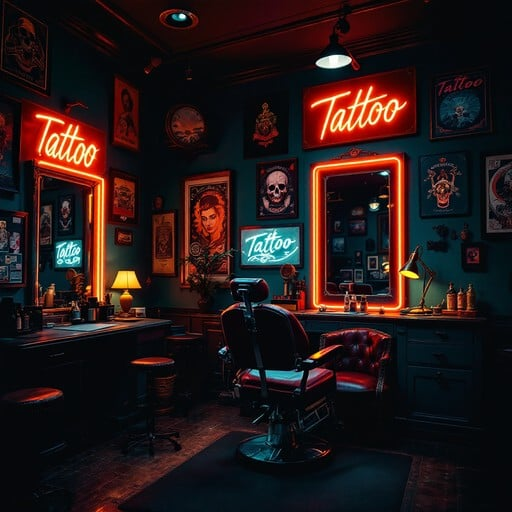
Ambient lighting should be completely independent from task lighting. 80-120 lux at eye level (from the client’s perspective, lying down), warm tone (2700K), indirect — bounced off the ceiling or walls, never direct. The client should feel like they’re in a comfortable space, not a surgical suite. The artist should be able to kill the ambient entirely during fine detail work and restore it during consultation or breaks.
One studio we worked with installed a simple DALI-dimmed cove light running along the perimeter ceiling. During the 90-minute consultation phase, ambient runs at 100 lux, task at 800 lux. When the session starts, the artist drops ambient to 40 lux and pushes task to 2500 lux. The client closes their eyes and relaxes. The artist has clinical-grade visibility. Nobody compromises.
The Consultation-to-Session Transition
This is the underappreciated lighting challenge in tattoo studios. Consultation is a sales conversation. The artist is showing flash, discussing placement, reading the client’s body language. The lighting should be warm, even flattering — 3000K, 200-300 lux at face level. The client should look good in the mirror. The designs should look good on the tablet screen.
Session is a precision task. 4000K, 2000+ lux, clinical accuracy. The transition between these two modes should take one button press. A CAIMETA AIscene controller mapped to “Consult” and “Session” presets handles this with a single tap on a wireless puck switch mounted at arm’s reach. The physical act of walking to a wall dimmer and cranking it up is a small friction, but in a studio doing 4-5 sessions a day across 3 chairs, those seconds add up.
The Budget Breakdown
For a 3-station studio, here’s what a proper lighting build looks like:
| Item | Per Station | Total (3 stations) |
|---|---|---|
| Overhead task panel (CRI 95+, tunable) | $450 | $1,350 |
| Lateral fill panel | $280 | $840 |
| Ambient cove/direct-indirect | $180 | $540 |
| BLE Mesh controller + puck switch | $120 | $360 |
| Wiring and mounting | $200 | $600 |
| Total | $3,690 |
For a studio billing $300/hour across three artists doing an average of 5 hours per day, that’s $4,500 in daily revenue. If better lighting improves artist endurance by even 30 minutes per day (less eye fatigue, fewer breaks, fewer “I need to step back and look” moments), the payback period is under 3 weeks.
What I Tell Every New Studio Owner
Don’t buy lighting last. The electrical plan should be done before the chair order goes out. Conduit runs for the task panels need to be exact — you don’t want an electrician drilling through your freshly painted brick wall because the chair position shifted 30cm during the build.
And don’t let your electrician default to “shop-grade” LED troffers. They’ll spec 4000K 80-CRI panels because that’s what they use in warehouses. Tattoo work demands higher color fidelity than warehousing. Insist on CRI 95+ for every task source. The delta between CRI 80 and CRI 95 is the difference between seeing what the ink actually looks like and seeing what you think it looks like.
Your artists will notice within the first session. Your clients will notice in how long they can lie still. Your Instagram will notice in the color accuracy of healed photos. And your bottom line will notice when rework appointments drop by 20%.